반응형
Amazon EC2 인스턴스(Amazon Linux 2)에 Elasticsearch를 설치하는 방법
Elasticsearch 설치하기
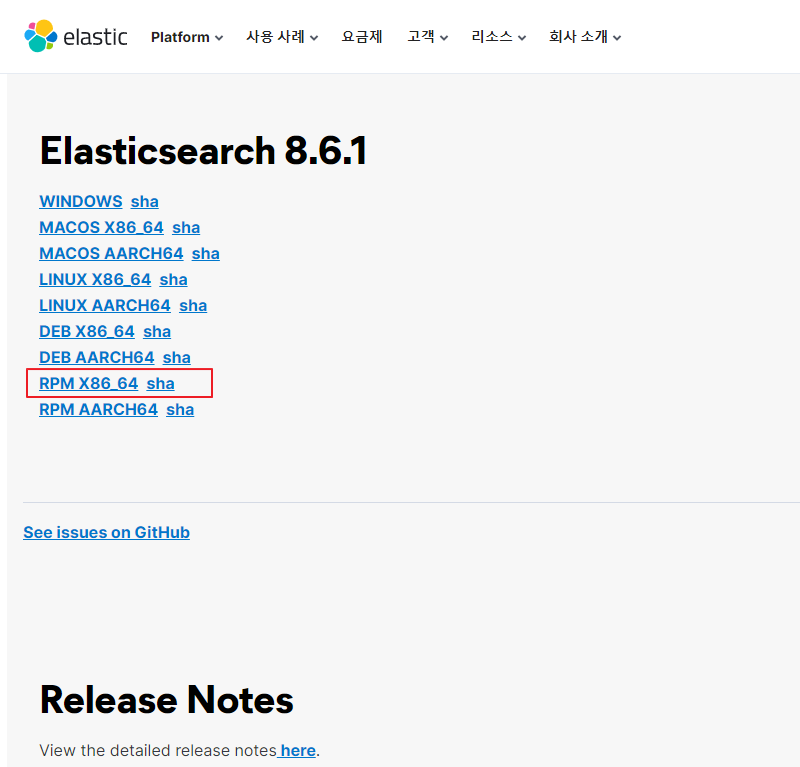
- elasticsearch download : https://www.elastic.co/kr/downloads/past-releases/elasticsearch-8-6-1
Elasticsearch 저장소 추가
Elastic의 Yum 리포지토리 패키지 다운로드
wget -q https://artifacts.elastic.co/downloads/elasticsearch/elasticsearch-8.6.1-x86_64.rpmwget -q https://artifacts.elastic.co/downloads/elasticsearch/elasticsearch-8.6.1-x86_64.rpm.sha512체크섬
sha512sum -c elasticsearch-8.6.1-x86_64.rpm.sha512$ sha512sum -c elasticsearch-8.6.1-x86_64.rpm.sha512
elasticsearch-8.6.1-x86_64.rpm: OK또는
sudo rpm --import https://artifacts.elastic.co/GPG-KEY-elasticsearchsudo tee /etc/yum.repos.d/elasticsearch.repo <<EOF
[elasticsearch]
name=Elasticsearch repository for 8.x packages
baseurl=https://artifacts.elastic.co/packages/8.x/yum
gpgcheck=1
gpgkey=https://artifacts.elastic.co/GPG-KEY-elasticsearch
enabled=1
autorefresh=1
type=rpm-md
EOFElasticsearch 패키지 설치
sudo yum install -y elasticsearch-8.6.1-x86_64.rpm...
Creating elasticsearch group... OK
Creating elasticsearch user... OK
Installing : elasticsearch-8.6.1-1.x86_64 1/1
--------------------------- Security autoconfiguration information ------------------------------
Authentication and authorization are enabled.
TLS for the transport and HTTP layers is enabled and configured.
The generated password for the elastic built-in superuser is : B56z9xsnM8NvpJtQu8Cv
If this node should join an existing cluster, you can reconfigure this with
'/usr/share/elasticsearch/bin/elasticsearch-reconfigure-node --enrollment-token <token-here>'
after creating an enrollment token on your existing cluster.
You can complete the following actions at any time:
Reset the password of the elastic built-in superuser with
'/usr/share/elasticsearch/bin/elasticsearch-reset-password -u elastic'.
Generate an enrollment token for Kibana instances with
'/usr/share/elasticsearch/bin/elasticsearch-create-enrollment-token -s kibana'.
Generate an enrollment token for Elasticsearch nodes with
'/usr/share/elasticsearch/bin/elasticsearch-create-enrollment-token -s node'.
-------------------------------------------------------------------------------------------------
### NOT starting on installation, please execute the following statements to configure elasticsearch
service to start automatically using systemd
sudo systemctl daemon-reload
sudo systemctl enable elasticsearch.service
### You can start elasticsearch service by executing
sudo systemctl start elasticsearch.service
Verifying : elasticsearch-8.6.1-1.x86_64 1/1
Installed:
elasticsearch.x86_64 0:8.6.1-1
Complete!Elasticsearch 서비스 시작 및 자동 시작 설정
Elasticsearch를 시작하고 시스템 부팅 시 자동으로 시작되도록 설정
systemctl daemon-reloadsystemctl --now enable elasticsearchElasticsearch 서비스 상태 확인
systemctl status elasticsearch$ systemctl status elasticsearch
● elasticsearch.service - Elasticsearch
Loaded: loaded (/usr/lib/systemd/system/elasticsearch.service; enabled; vendor preset: disabled)
Active: active (running) since Thu 2023-02-16 09:59:38 KST; 37s ago
Docs: https://www.elastic.co
Main PID: 4245 (java)
Tasks: 95
Memory: 2.7G
CGroup: /system.slice/elasticsearch.service
├─4245 /usr/share/elasticsearch/jdk/bin/java -Xms4m -Xmx64m -XX:+UseSerialGC -Dcli.name=server -Dcli.script=/usr/shar...
├─4309 /usr/share/elasticsearch/jdk/bin/java -Des.networkaddress.cache.ttl=60 -Des.networkaddress.cache.negative.ttl=...
└─4330 /usr/share/elasticsearch/modules/x-pack-ml/platform/linux-x86_64/bin/controller
Feb 16 09:58:57 krsecure-mgmt-es-01 systemd[1]: Starting Elasticsearch...
Feb 16 09:59:38 krsecure-mgmt-es-01 systemd[1]: Started Elasticsearch.elasticsearch 서비스 포트 확인
$ netstat -nlpt | egrep '9200|9300'
tcp6       0      0 :::9200                 :::*                    LISTEN      4309/java
tcp6       0      0 :::9300                 :::*                    LISTEN      4309/java
728x90
Elasticsearch 구성
Elasticsearch 설정 파일은 /etc/elasticsearch/elasticsearch.yml에 위치해 있습니다. 필요에 따라 설정 파일을 편집하여 클러스터 이름, 노드 이름, 네트워크 설정 등을 구성할 수 있습니다.
elasticsearch 설정 파일(elasticsearch.yml)
cat /etc/elasticsearch/elasticsearch.yml | egrep -v '^$|^#'$ cat /etc/elasticsearch/elasticsearch.yml | egrep -v '^$|^#'
path.data: /var/lib/elasticsearch
path.logs: /var/log/elasticsearch
xpack.security.enabled: true
xpack.security.enrollment.enabled: true
xpack.security.http.ssl:
enabled: true
keystore.path: certs/http.p12
xpack.security.transport.ssl:
enabled: true
verification_mode: certificate
keystore.path: certs/transport.p12
truststore.path: certs/transport.p12
cluster.initial_master_nodes: ["es-01"]
http.host: 0.0.0.0systemctl restart elasticsearchElasticsearch 확인
built-in users
- https://www.elastic.co/guide/en/elasticsearch/reference/current/built-in-users.html
elasticsearch 기본 계정은 elastic입니다.
curl -s -k -u [user]:[password] https://localhost:9200curl -s -u elastic:B56z9xsnM8NvpJtQu8Cv https://127.0.0.1:9200 -k | jq$ curl -s -u elastic:B56z9xsnM8NvpJtQu8Cv https://127.0.0.1:9200 -k | jq
{
"name": "es-01",
"cluster_name": "elasticsearch",
"cluster_uuid": "5DxCf5tdSh2KNTykFOZ2XQ",
"version": {
"number": "8.6.1",
"build_flavor": "default",
"build_type": "rpm",
"build_hash": "180c9830da956993e59e2cd70eb32b5e383ea42c",
"build_date": "2023-01-24T21:35:11.506992272Z",
"build_snapshot": false,
"lucene_version": "9.4.2",
"minimum_wire_compatibility_version": "7.17.0",
"minimum_index_compatibility_version": "7.0.0"
},
"tagline": "You Know, for Search"
}
curl --cacert /etc/elasticsearch/certs/http_ca.crt -u elastic https://localhost:9200curl -s --cacert /etc/elasticsearch/certs/http_ca.crt -u elastic https://localhost:9200 | jq$ curl -s --cacert /etc/elasticsearch/certs/http_ca.crt -u elastic https://localhost:9200 | jq
Enter host password for user 'elastic':
{
"name": "es-01",
"cluster_name": "elasticsearch",
"cluster_uuid": "5DxCf5tdSh2KNTykFOZ2XQ",
"version": {
"number": "8.6.1",
"build_flavor": "default",
"build_type": "rpm",
"build_hash": "180c9830da956993e59e2cd70eb32b5e383ea42c",
"build_date": "2023-01-24T21:35:11.506992272Z",
"build_snapshot": false,
"lucene_version": "9.4.2",
"minimum_wire_compatibility_version": "7.17.0",
"minimum_index_compatibility_version": "7.0.0"
},
"tagline": "You Know, for Search"
}curl -s -u elastic:B56z9xsnM8NvpJtQu8Cv https://127.0.0.1:9200/_cluster/health -k | jq$ curl -s -u elastic:B56z9xsnM8NvpJtQu8Cv https://127.0.0.1:9200/_cluster/health -k | jq
{
"cluster_name": "elasticsearch",
"status": "green",
"timed_out": false,
"number_of_nodes": 1,
"number_of_data_nodes": 1,
"active_primary_shards": 2,
"active_shards": 2,
"relocating_shards": 0,
"initializing_shards": 0,
"unassigned_shards": 0,
"delayed_unassigned_shards": 0,
"number_of_pending_tasks": 0,
"number_of_in_flight_fetch": 0,
"task_max_waiting_in_queue_millis": 0,
"active_shards_percent_as_number": 100
}
참고URL
- elasticsearch 설치 : Install Elasticsearch with RPM
728x90
반응형
'퍼블릭 클라우드' 카테고리의 다른 글
| aws ec2 인스턴스(ubuntu)에 goofys를 설치하고 S3 버킷을 마운트하는 방법 (0) | 2023.02.17 |
|---|---|
| [aws] ec2 인스턴스(amazon linux 2)에 kibana를 설치하기 (0) | 2023.02.16 |
| [aws] Amazon Linux 2 인스턴스에 SSM Agent(Systems Manager Agent) 업데이트하기 (0) | 2023.02.06 |
| aws gossm 설치 및 사용하기 (0) | 2023.02.06 |
| [클라우드] 클라우드 서비스 공급자(cloud provider) (0) | 2023.01.17 |


